
How to Scan Freeview Channels on Samsung TV
Unlock the Possibilities to Get All Your Favourite Channels on Samsung TV in Just a Few Easy Steps!

Are you perplexed about how to scan Freeview channels on your Samsung TV? Don’t worry; we’ve got you covered with a straightforward guide to help you through the process. With these step-by-step instructions, you can effortlessly find and enjoy all the Freeview channels available. Let’s get started!
- Important step: Connect your Samsung TV to an aerial or antenna before scanning for Freeview channels.
- Simple process: Scanning for Freeview channels on a Samsung TV is a straightforward task that can be done in just a few easy steps.
- Access to new channels: By scanning for Freeview channels, you can discover a variety of free-to-air TV channels and expand your viewing options without any additional cost.

Necessary Factors to Consider
Now that we understand the importance of scanning Freeview channels on your Samsung TV, there are a few necessary factors to consider for a successful scan. These key factors include:
- Antenna: Ensure you have a suitable antenna connected to your TV to receive the Freeview signal.
- Location: Your location is crucial in the number of channels you can receive. Ensure you are in an area with good signal coverage for Freeview.
- Parental Controls: It’s vital to ensure that parental controls are set up correctly on your Samsung TV to filter out inappropriate content. You can find more information on Samsung Smart TV parental controls and settings.
Assume these factors are in place to ensure a smooth scanning process and optimal channel reception.
How to Ensure Freeview Compatibility on Samsung TV
Before scanning Freeview channels on your Samsung TV, ensuring your TV is compatible with Freeview is crucial. Check the specifications of your TV to confirm Freeview compatibility. You can do this by referring to your TV’s user manual or visiting the manufacturer’s website.
Tips on Adjusting Reception for Optimal Scan Results
Adjusting your TV’s reception to achieve optimal scan results is essential when scanning Freeview channels. Here are a few tips to help you:
- Positioning the Antenna: Ensure your antenna is positioned correctly to receive the best signal quality.
- Signal Strength: Check the signal strength on your TV and adjust the antenna placement or direction for better reception.
- Interference: Minimize any potential sources of interference, such as electronic devices, to improve reception quality.
Though these adjustments may seem minor, they can significantly impact the quality of your Freeview channel reception. Go through this guide about Freeview on Samsung TV.
Step-by-step Instructions to Scan Freeview Channels on Samsung TV
However, to successfully scan Freeview channels on your Samsung TV, follow the step-by-step instructions outlined in the table below:
| Step | Instruction |
|---|---|
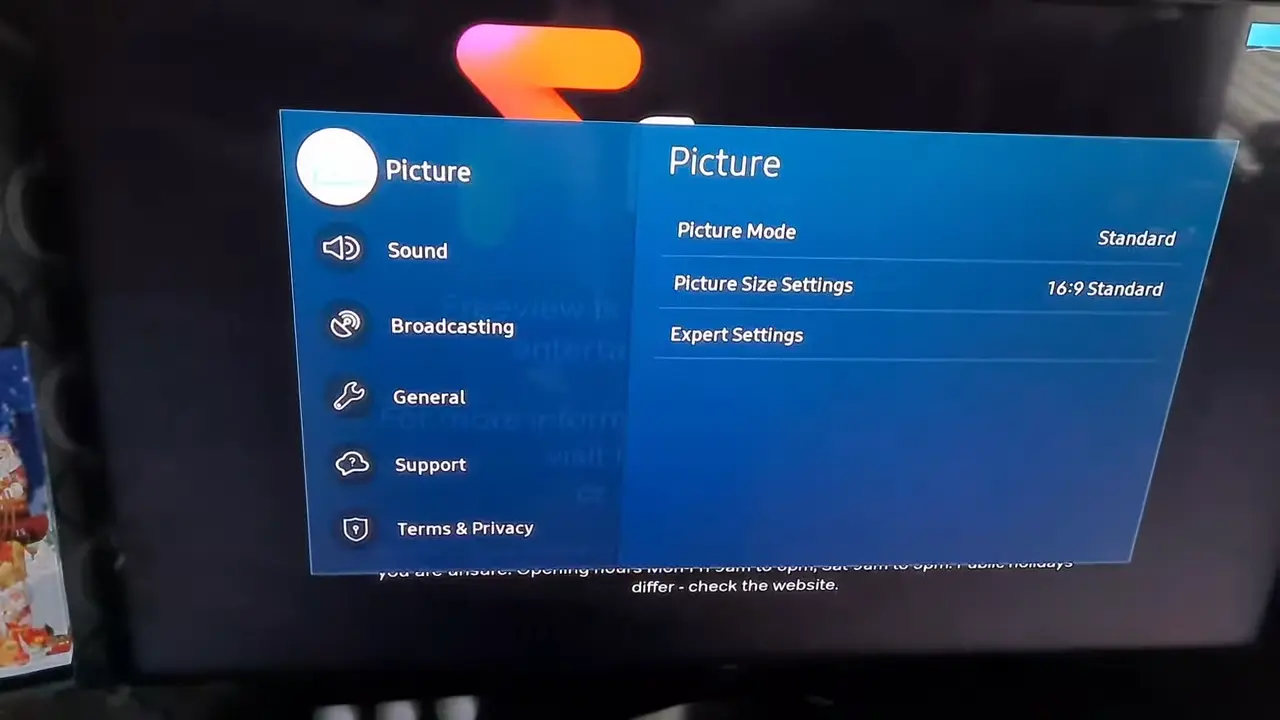
| Step 1 | Press the "Menu" button on your remote control. |
| Step 2 | Navigate to "Settings" using the navigation buttons and press the "Enter" button. |
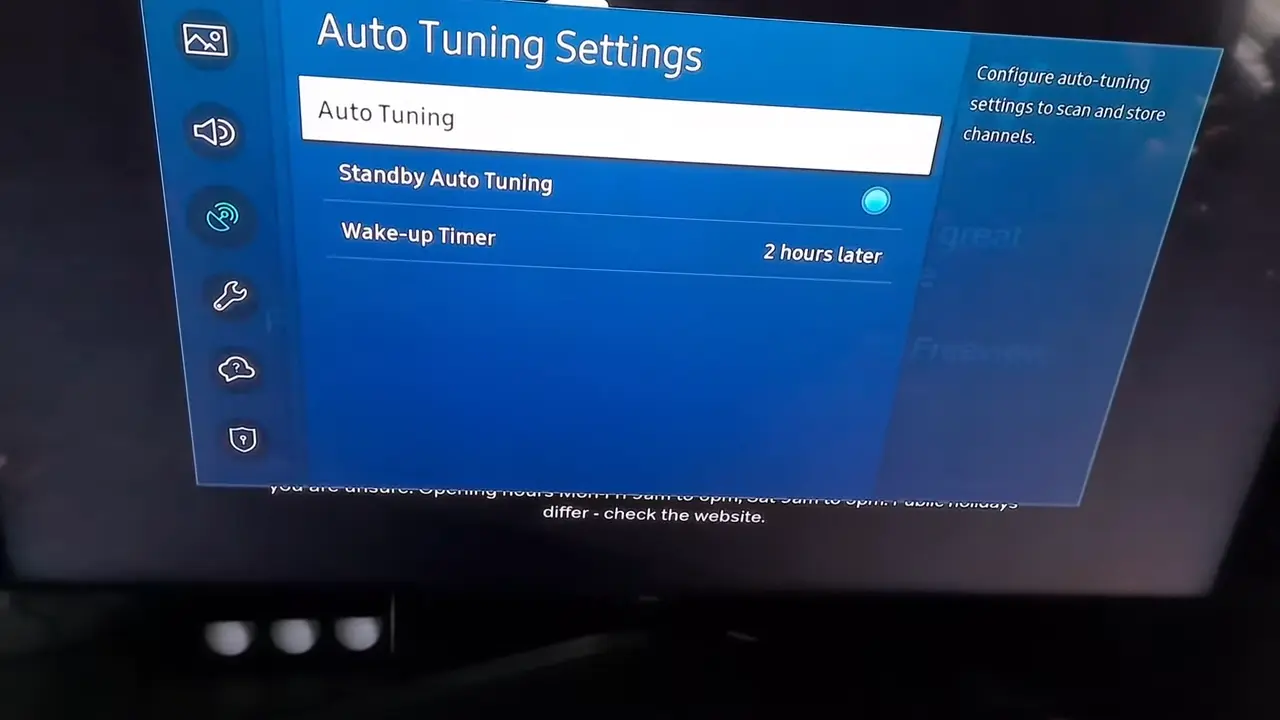
| Step 3 | Select "Broadcasting" and press "Enter". |
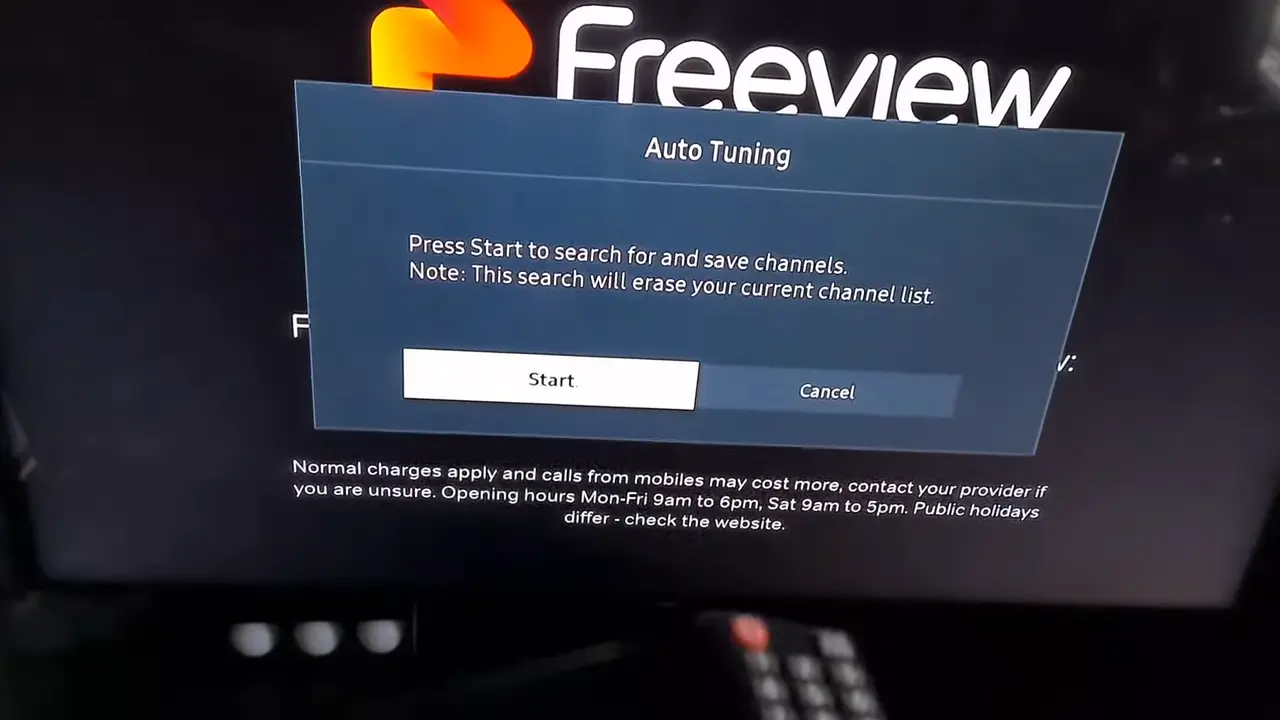
| Step 4 | Choose "Auto Tuning" and press "Enter". |
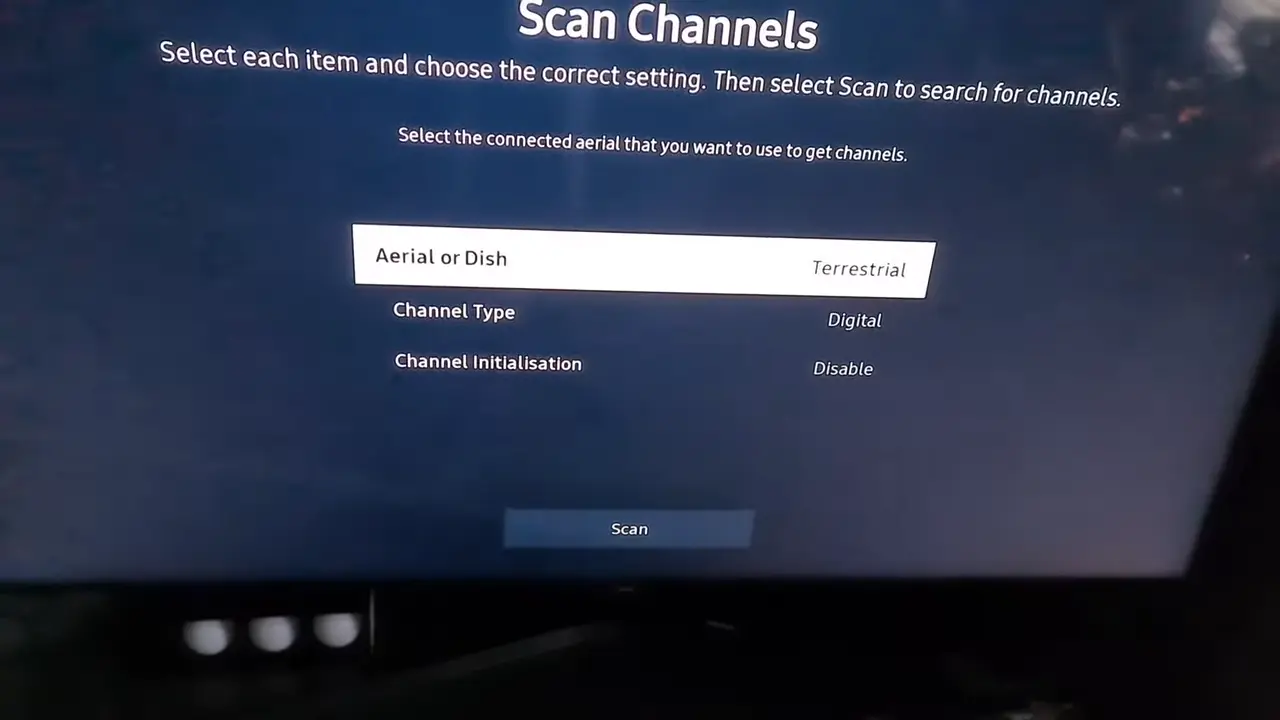
| Step 5 | Select "Start" and press "Enter" to go to the connected aerial selection. |
| Step 6 | Select the connected aerial, then navigate to "Scan" button and press "Enter" which begins the scanning for Freeview channels. |
| Step 7 | Wait for the scanning process to complete, which may take a few minutes. |
| Step 8 | Once the scanning is done, press "Exit" to return to the normal viewing mode. |

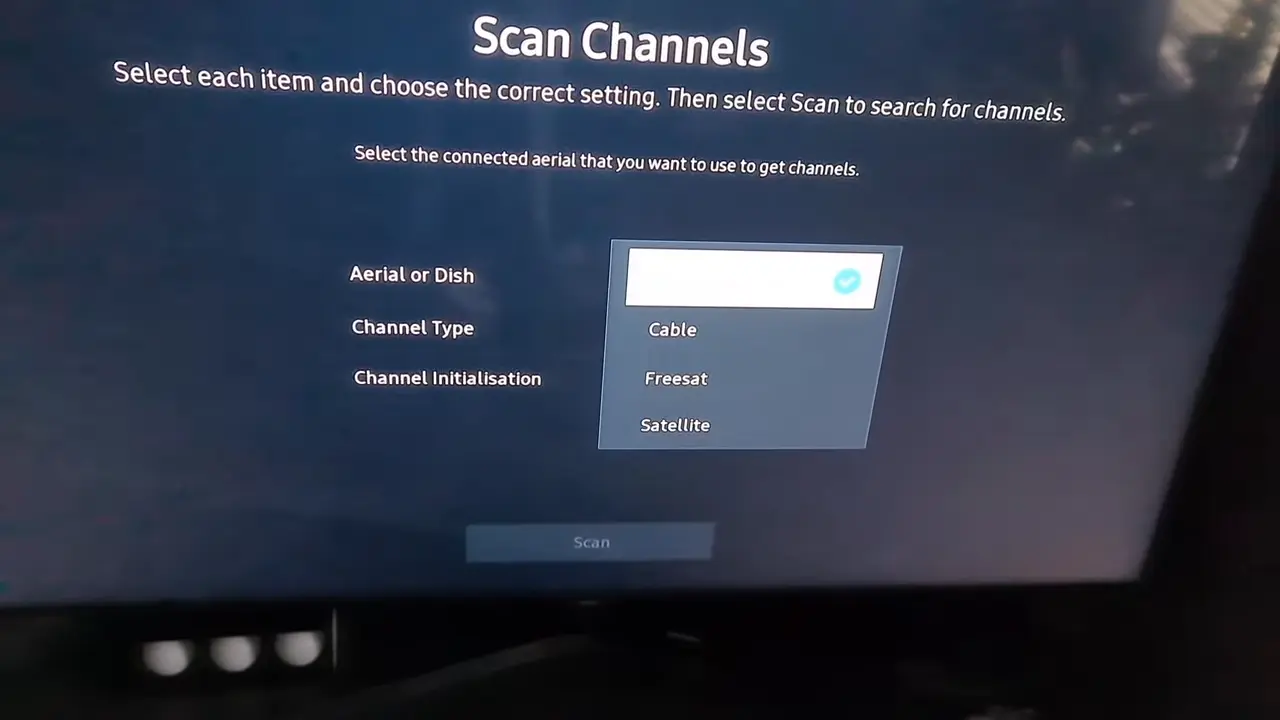
How to Navigate Samsung TV Menu for Scanning
When scanning for Freeview channels on your Samsung TV, navigating the TV menu correctly is essential to access the scanning feature. By pressing the “Menu” button on your remote, you can easily access the settings and channel options to initiate scanning.
Tips through Each Step of the Scanning Process
Throughout the scanning process, ensuring that your TV is connected to the antenna and the signal is strong is essential. Additionally, be patient during the scanning, as it may take a few minutes to complete. Check for any interference or obstructions that may affect the scanning process. This will ensure that you receive the best signal and that all available channels are captured during the scan. This way, you can enjoy a seamless viewing experience with high-quality Freeview channels on your Samsung Smart TV. This will help you get a better signal and access all available channels.
- Ensure the TV is connected to the antenna
- Check for signal strength and any interference
- Be patient during the scanning process
Troubleshooting Common Issues
You may encounter some common issues despite following the step-by-step instructions for scanning for Freeview channels on your Samsung TV. Don’t worry; I’m here to help you troubleshoot and resolve them.
How to Resolve an Unsuccessful Scan
Don’t be disheartened if your initial scan for Freeview channels on your Samsung TV was unsuccessful. Sometimes, a simple rescan can do the trick. Go to the channel list and select ‘Channel Tuning’ or ‘Auto Tuning’. Follow the on-screen instructions to initiate another scan. Check more about the potential of Freeview on Samsung TV for a better understanding.
If the problem persists, check the connection of your aerial or antenna to ensure it is securely attached. Sometimes, you may need to reposition your aerial to obtain a better signal. Additionally, no obstructions such as tall buildings or trees affect the reception.
Tips on Improving the Received Signal Strength
If you are experiencing poor signal strength or pixelation on your Freeview channels, there are a few things you can do to improve the situation.
- Firstly, check the position and orientation of your aerial. Adjust it so that it is pointing toward the nearest transmitter.
- Secondly, ensure that the aerial cable is not damaged and is connected securely to your TV. You can also use a signal booster or amplifier to enhance the signal strength. This can be especially useful if you live in an area with weak signal coverage.
- Finally, consider upgrading to an external one for better reception if you use an indoor aerial. This can significantly improve the quality of your Freeview channels. This will help maximize the reception and enjoyment of Freeview channels on your Samsung TV. Get help if your Samsung TV not finding channels.
Conclusion
Upon reflecting on the step-by-step instructions for scanning Freeview channels on a Samsung TV, we’re confident that you now have the knowledge and ability to navigate this process easily. Remember always to ensure you have a good reception, correctly position your antenna, and follow each step carefully. You can access a wide range of Freeview channels by following these instructions, enhancing your TV viewing experience.
FAQs
How do I scan for Freeview channels on my Samsung TV?
You can follow these step-by-step instructions to scan for Freeview channels on your Samsung TV:
- Press the “Menu” button on your remote control.
- Navigate to “Settings” using the navigation buttons and press the “Enter” button.
- Select “Broadcasting” and press the “Enter” button.
- Choose “Auto Tuning” and press the “Enter” button.
- Select “Start” and press “Enter” to go to the connected aerial selection.
- Select the connected aerial, then navigate to the “Scan” button and press “Enter”, which begins the scanning for Freeview channels.
- Wait for the scanning process to complete, which may take a few minutes.
- Once the scanning is done, press “Exit” to return to the normal viewing mode.
How do I access the settings menu on my Samsung TV?
To access the settings menu, press the Home button on your remote, navigate to the Settings icon, and press Enter.
What is Freeview, and why is it important to scan for its channels?
Freeview is a digital terrestrial television service that provides access to various TV channels and radio stations. It is crucial to scan for Freeview channels to ensure you have access to all available programming in your area.
How do I initiate the channel scan on my Samsung TV?
Once in the settings menu, navigate to the Broadcasting option, select Auto Tuning, and then choose Start to begin the channel scan process.
What do I do if the channel scan does not pick up all available channels?
If the channel scan does not pick up all available channels, try repositioning your antenna for better reception, or consider upgrading to a more powerful antenna. You can also try the manual tuning option to add missing channels. If issues persist, contact your local Freeview service provider for assistance.


